Roof Rack Mounting System

Adjustable System to Mount Solar Panels and More
With Zero Roof Penetrations to Possibly Leak
In addition to not penetrating the roof, racking offers a couple other big advantages for Cargo Conversions over directly attaching panels to your roof.
1) Panels cover the roof with an air gap greatly reducing the heat produced inside the trailer.
2) The more you cover of the roof, the less rain noise you will have on your tin roof on those days you have to wait out the weather.
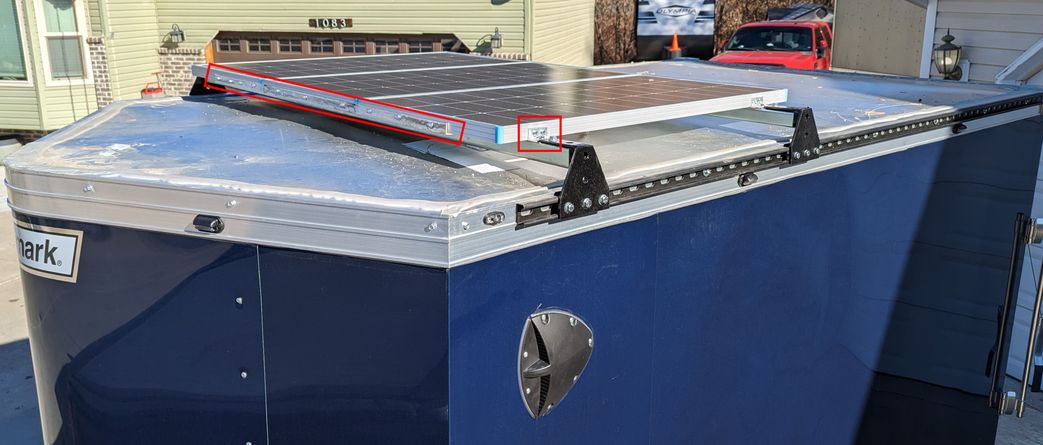
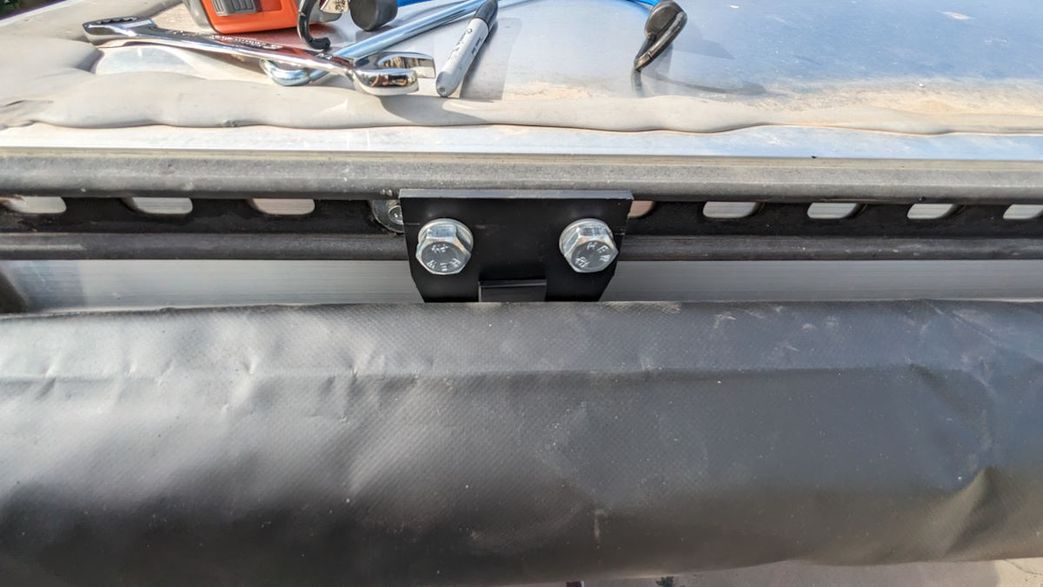
How we attach the strut to the side of the trailer really depends on the trailer.
The top trim piece that comes with the trailer is screwed to the top of the wall steel members using a #14 x 1-1/4" hex head usually but they vary on where it is on the trim. Sometimes it is low and sometimes centered top to bottom, this will determine if you need a spacer. We reuse the holes already in the trim if centered and no spacer needed.
If a spacer is needed to miss screw heads we use a piece of 1/8" thick x 1-1/2" wide aluminum flat stock.
Available at most hardware stores in various lengths, we typically cut them in 4-6" pieces and place every 2' between the strut and trailer.
Click on pictures to see full size image

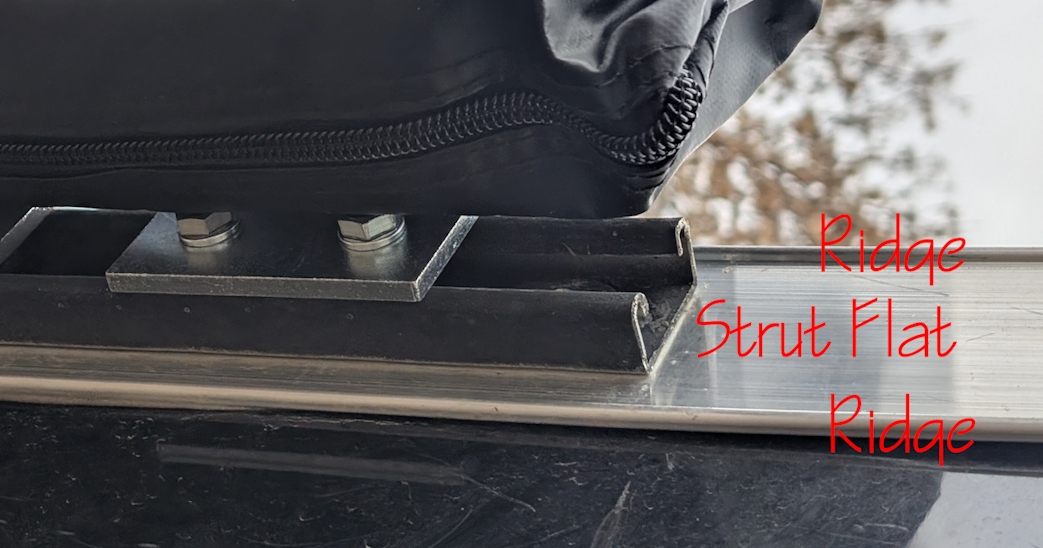
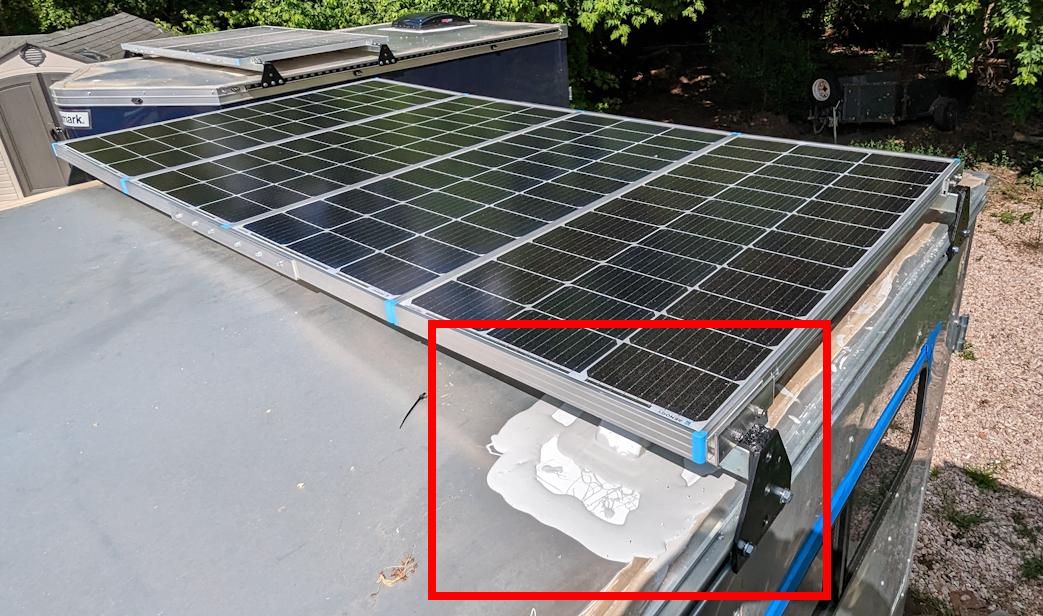
Use 1-1/4" #14 self tapping hex head screws to attach the strut with 1/4" x 1" fender washers.
We use butyl tape if we need the aluminum spacer (it goes between spacer and trailer so it fully seals holes) but if no spacer needed to keep strut flat then we use a quality silicone under the fender washer so it is compressed when tightened, we apply the silicone BEFORE inserting hex head, pre-drill if needed. This way silicone is inside the hole and under the fender washer. When tightened it should fill the oval hole in the strut and the fender washer should cover it and seal the penetration.
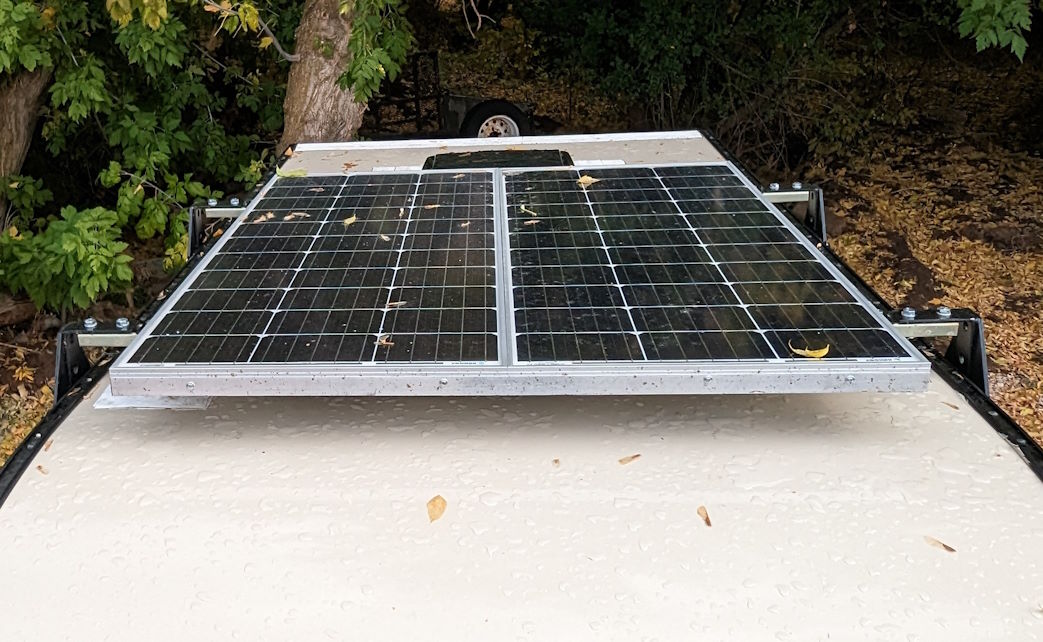
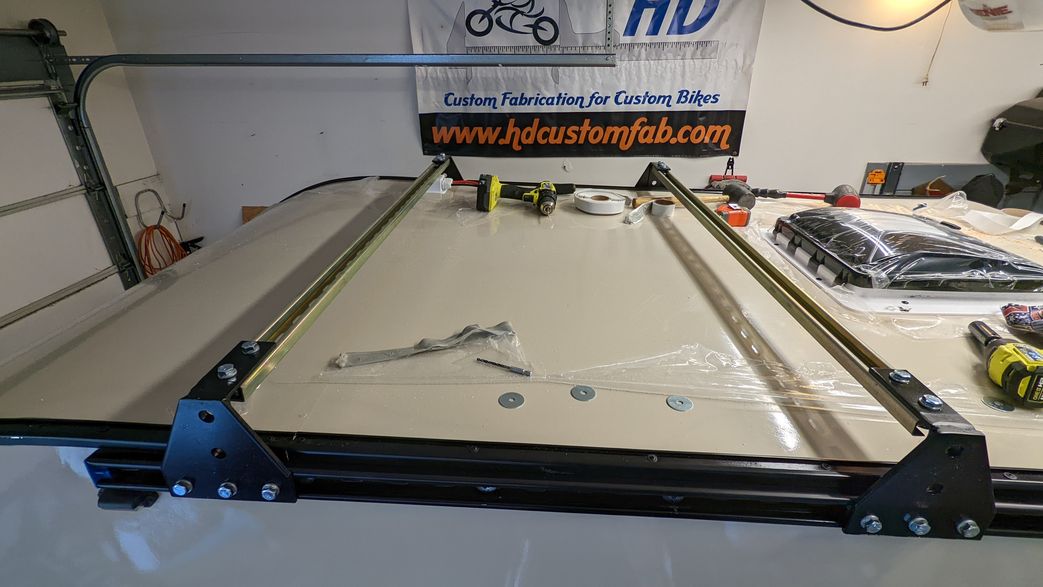
The shallow strut will bow on spans over 6 feet so only use it on the side of trailer.
Use the 12 gauge deep strut across the top to support panels.
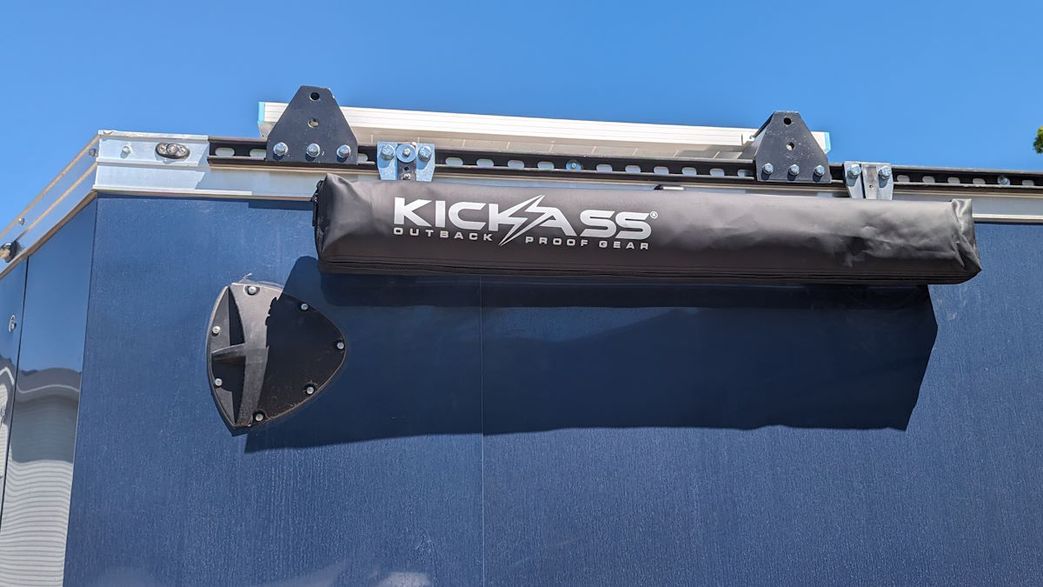
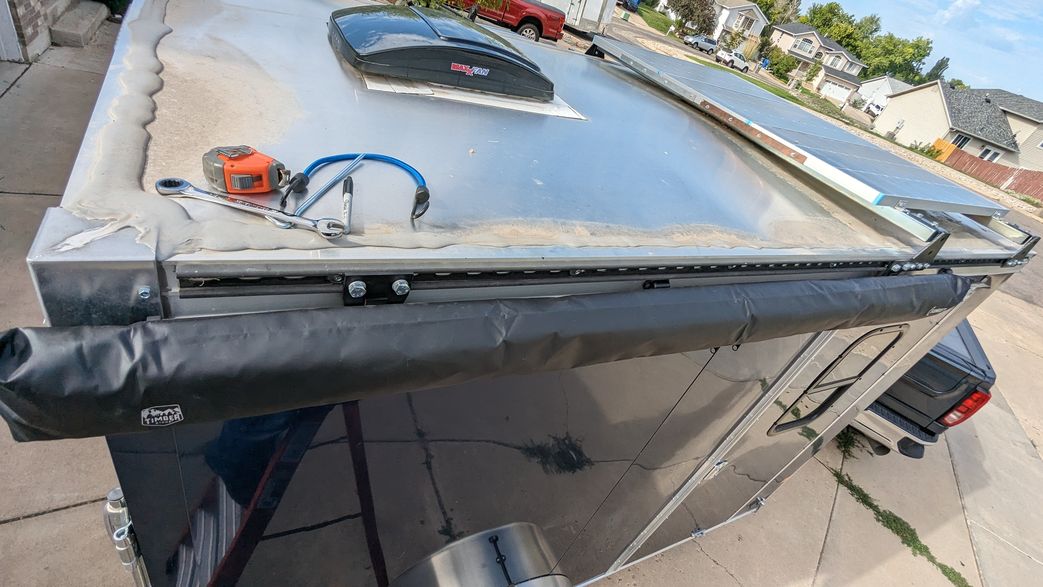
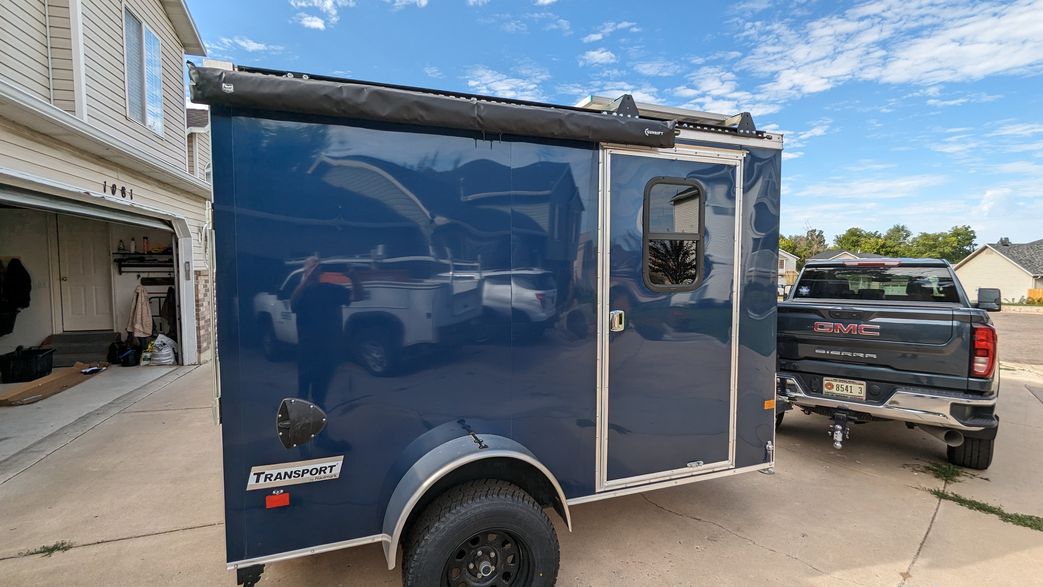
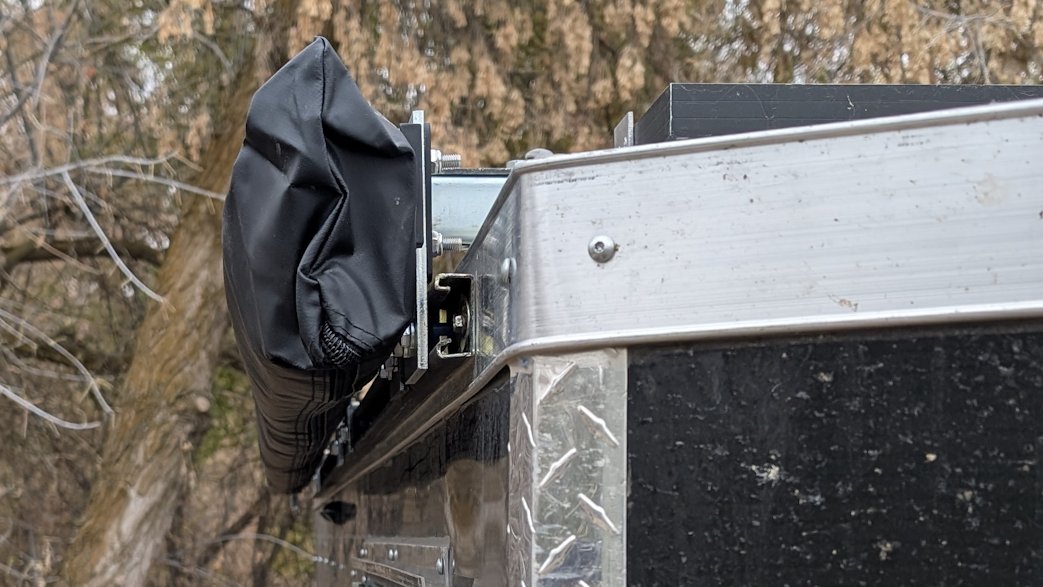
The beauty of the strut system is the ability to add additional features, such as an awning, or privacy shower enclosure as shown in the pictures below. These can be added anywhere on the strut system to meet your needs.
Aluminum vs Steel
Aluminum Unistrut is a light weight alternative to steel Unistrut, however with the reduced self weight comes greatly reduced performance. The Aluminum Unistrut uses a 33% reduction factor for all beam and column loading.Cost can be a large factor in material choice, depending on where you source aluminum strut the cost can be as much as 4x the cost of galvanized steel strut, if you can source it locally without shipping costs. Standard galvanized steel strut can be easily purchased at Home Depot or Lowes among other local hardware locations.
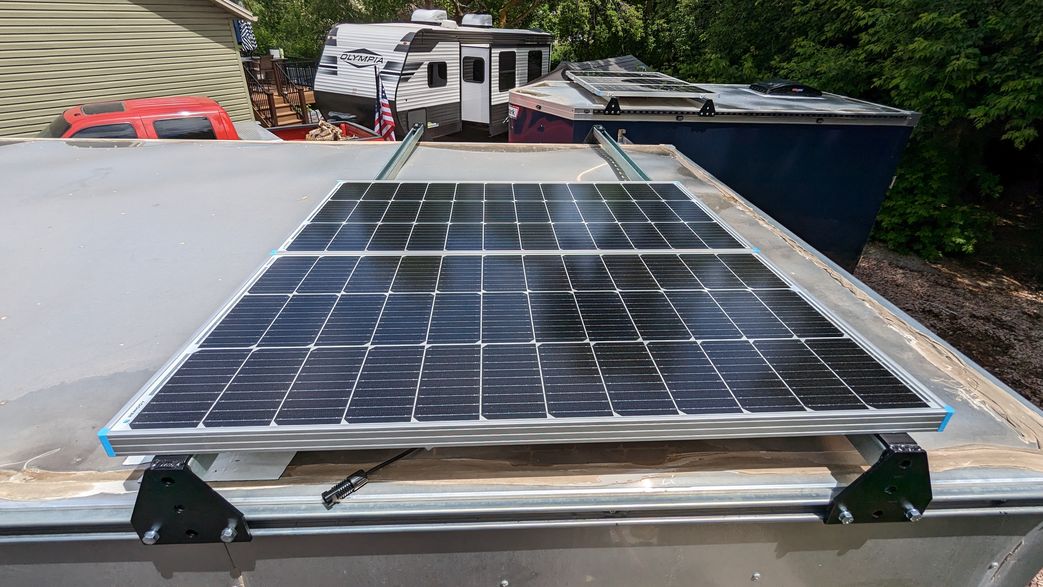
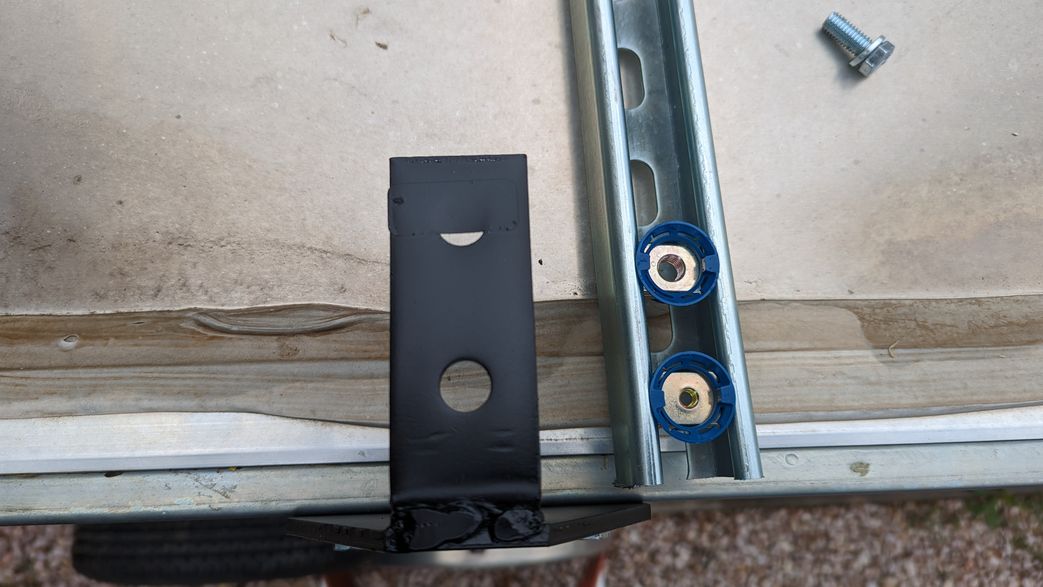
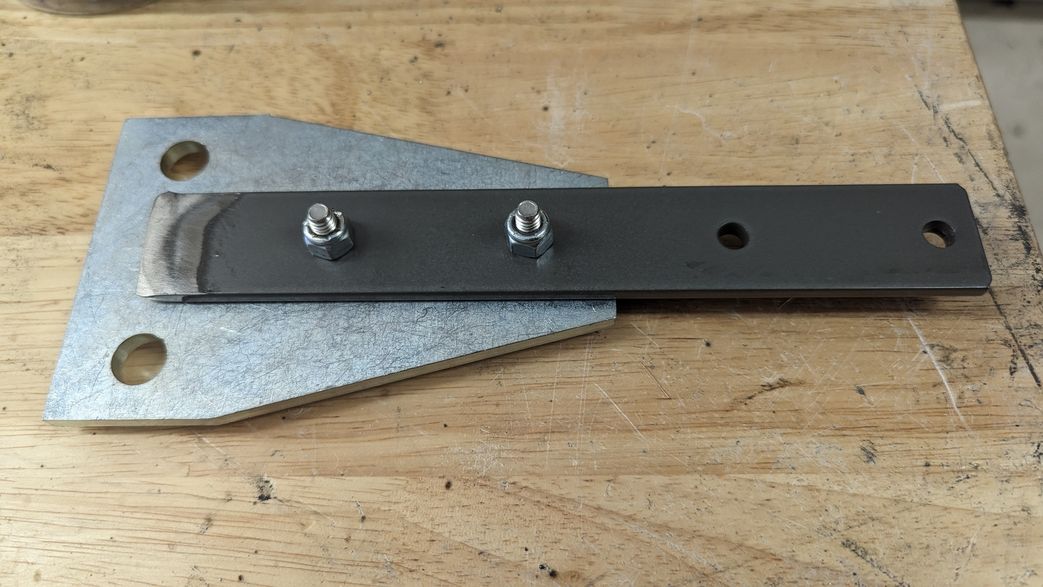
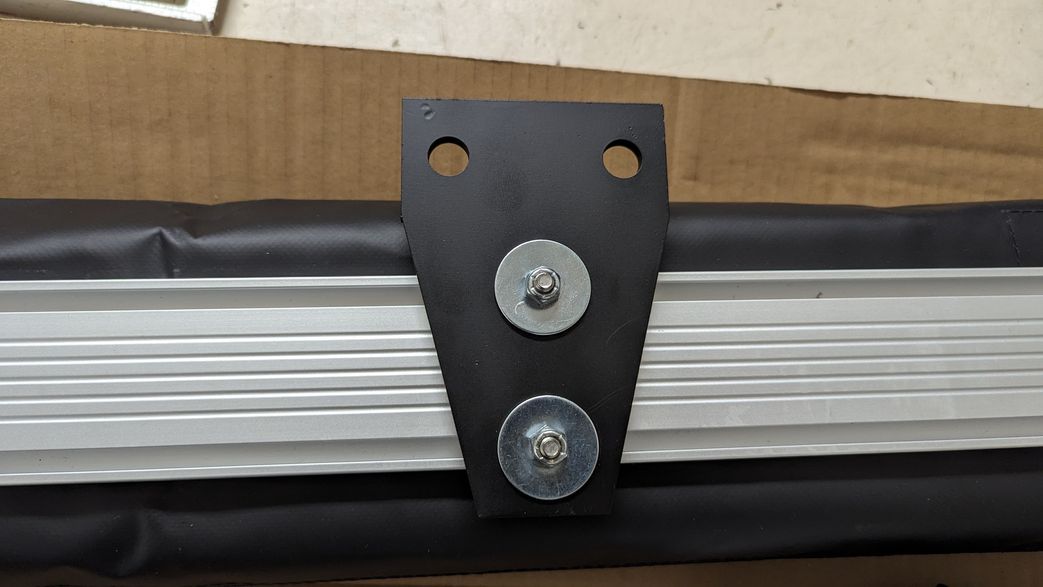
Mounting Bracket
The mounting bracket is made using a flat "Strut Mounting Bracket" and "Strut L Bracket" as listed below in the Solar Rack Components link section.The flat plate and L bracket can be welded or bolted together depending on your situation.
The "L" bracket can also be set at different heights to accommodate a curved roof if need be, this is easiest when welding the components together.
There are 3 different styles of plates that we have used based on availability and price, all work fine.


When you have the rounded edge roof, you can gain roughly 2" of additional height on the rack by bolting the deep strut on the top of the L bracket.


Securing Panels
There are several methods for securing your panels.You can use commercially available systems such as these for the edges:

Link to Edge Clamps
If you are using larger panels, we strongly recommend using clamps between the panels to prevent flex, these can also be helpful when mounting any size panels edge to edge:
When adding strut between crossmembers use T Plates with 3/8" nuts and bolts.


Link to Panel Clamps
You can also make brackets using aluminum or steel angle:
Do not use this method if panels have any type of conductor in the frame, most do not, but double check.
When making your own clips, 1/4" bolts and strut nuts are our preferred way to secure the clip to the strut, and self drilling screws to secure clip to the side of the panel.

If you are mounting multiple panels side by side, you can also use a length of 1" aluminum angle on the front and/or rear of the group of panels to add rigidity and prevent flex.

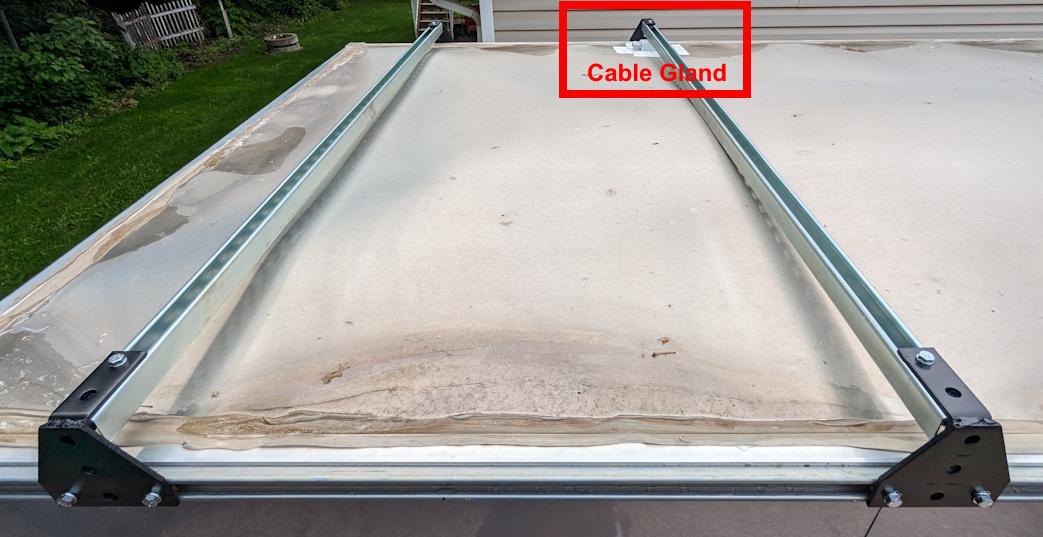
Cable Glands
As you will see in the slide show of pictures below, we mount the cable gland so the panels cover it. This is important in snow country to prevent melting snow finding it's way inside. We also prefer to keep all wires covered and out of direct sunlight, even though most solar cable is UV rated, covering helps increase the life of the cables.Use a steel chase nipple and a bushing for the roof penetration to protect the cables from the metal roof, using silicone sealant around the chase as you insert it through roof.
Typically we silicone between the gland and roof as we screw it down, then use Dicor self-leveling sealant all around the gland.
Available at most hardware stores

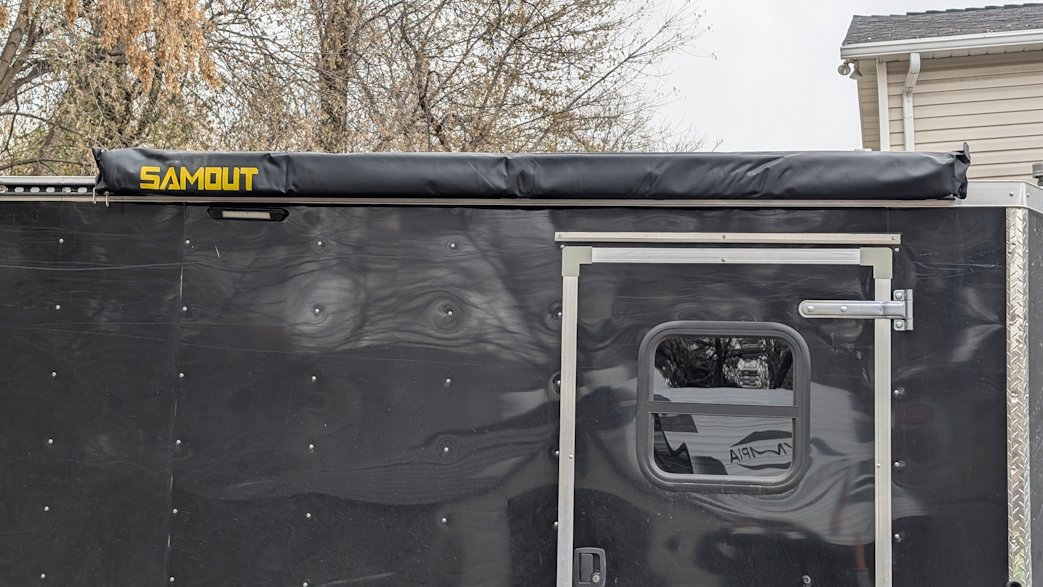
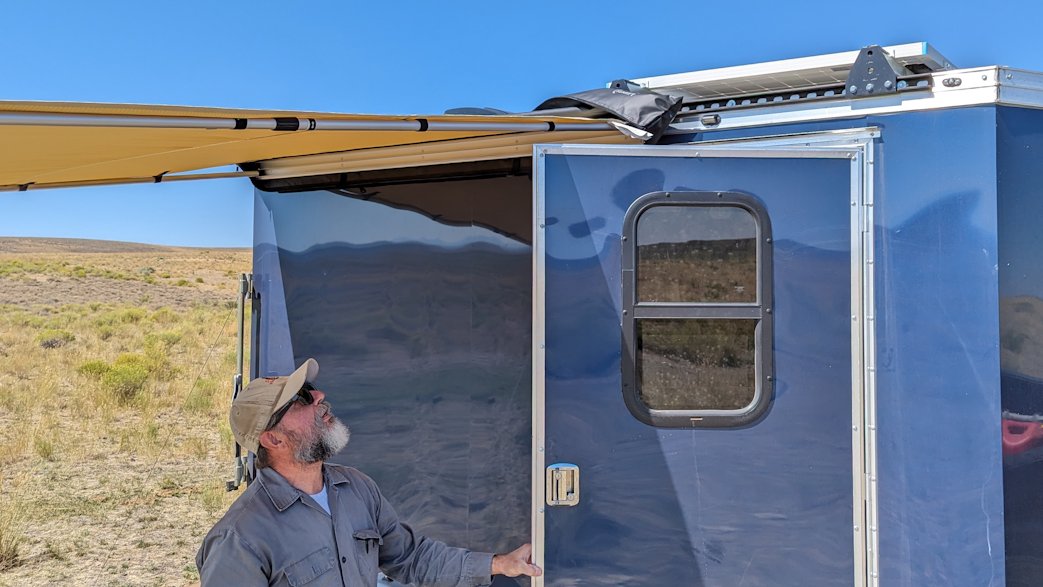
Awnings
Mounting an awning or other equipment is very easy as well with this system, the tracks on the commercially available awnings such as you see in the pictures below line up with the holes in the mounting brackets listed. Just bolt them to the awning and bolt to the strut using strut nuts and bolts.Check clearance on your man door to ensure it clears your awning so the corner of the door does not rip it.


Images are Links
Tips & Advice

Helpful Hints
Harley Hauler

Ditch the Straps
Design/Build
Services

Pricing our Services
Power Budget

Calculate the correct
power for your adventures
Weight Calculator

Know your weights
Tongue Weight
Build Weight
and
Total Weight
Contact Us

Questions?
Send Us a Message


